RESTful API’s mit Spring Boot & Java Persistence API (JPA)
Preamble
You always wanted to create RESTful API’s that store their data in a database? In this tutorial I will show you how you can use Spring Boot, Java Persistence API (JPA) and MySQL to create a small RESTful API that stores your data in a local MySQL database.
Requirement
- Docker installation or local MySQL installation
- Basic knowledge of Apache Maven
- Basic knowledge of REST API
- Basic knowledge of Spring Boot
Docker Container for MySQL
As mentioned in the introduction we need a database for our RESTful API. For this you can either install a local MySQL instance or start or stop a MySQL database instance with Docker Compose.
In this tutorial we will use a MySQL database instance, which we start via Docker Compose. This has the advantage that you don’t have to install your own MySQL database.
To start a MySQL database instance with Docker Compose, we first need a configuration file named „docker-compose.yml“. Here we enter our values for the MySQL database instance.
The following section shows the complete docker-compose.yml file
version: '3.3'

services:
  db:
    image: mysql:5.7
    ports:
    - 3306:3306
    environment:
      MYSQL_ROOT_PASSWORD: rootPassword
      MYSQL_DATABASE: jpaTutorial
      MYSQL_USER: jpaUser
      MYSQL_PASSWORD: jpaPassword
We start the MySQL database instance on the console with the commands „docker-compose up“ or „docker-compose up -d“. Both commands start the database instance. The parameter „-d“ starts the MySQL database instance in Detached mode. So in the background!
Create Spring Boot project
After we have started our MySQL database we will create a Spring Boot project. For this purpose Spring offers a configurator on its website https://start.spring.io/, with which you can create a Spring Boot project. The nice thing about this page is that you can specify the libraries you need directly here.
First we enter the value for Group for our project. In my case I entered „de.ertantoker.tutorials“. Then we enter the value for Artifact. Here you can enter a name of your choice. In my case it is „spring-boot-jpa“.
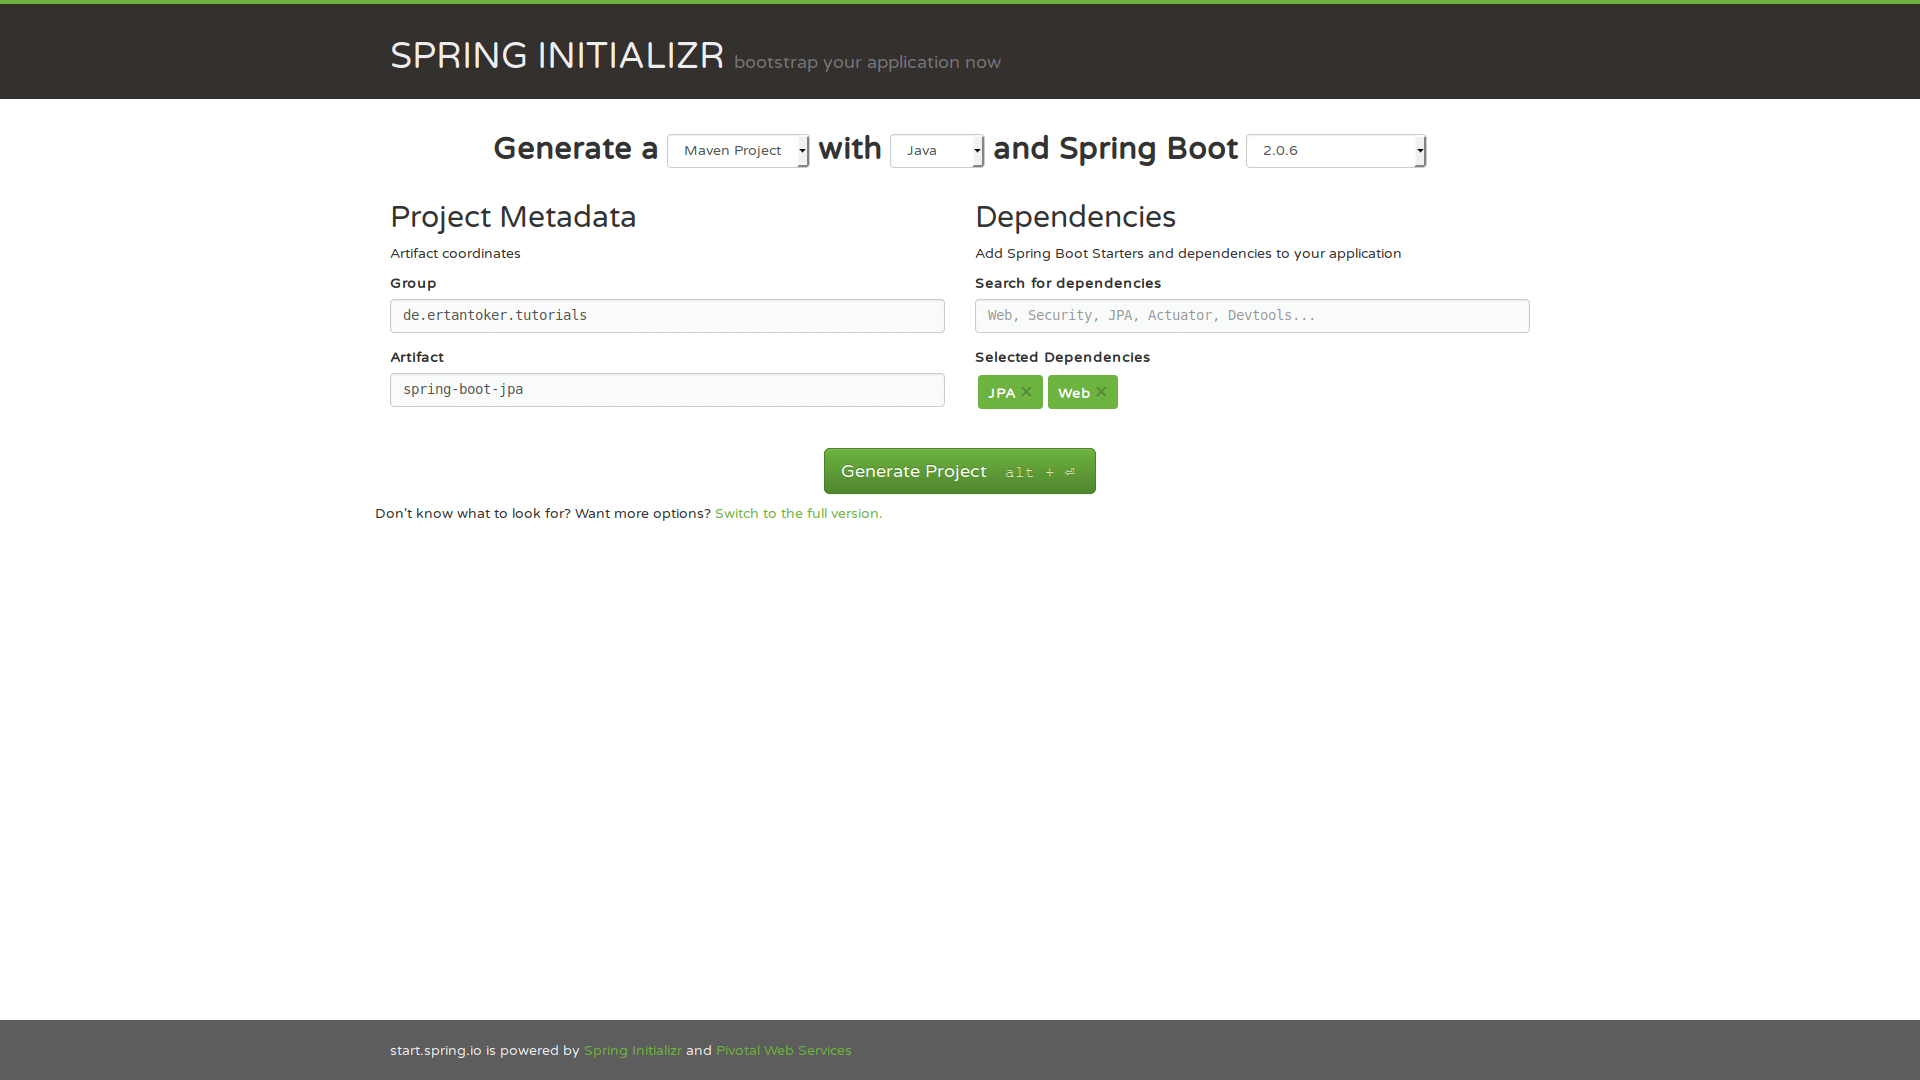
For our project we need two libraries. In our case we need „JPA“ and „Web“. You can enter and select both libraries at Dependencies on the right.
After we have entered and selected everything, we create our project by clicking on the button „Generate Project“.
Directly after the click a download starts, which contains our project with the corresponding libraries. Next we have to import our project into our IDE. Which IDE you use is up to you
Configurations
Sobald unser Projekt importiert ist können wir nun die Konfigurationen vornehmen, die wir für unsere RESTful API benötigen
Java Persistence API (JPA) in Spring Boot
First we add the JPA and Spring Boot specific properties to the application.yml. In the project we just imported.
The following section shows the application.properties file.
spring.application.name=Spring Boot RESTController and JPA Tutorial
spring.jpa.hibernate.ddl-auto=create
spring.datasource.url=jdbc:mysql://localhost:3306/jpaTutorial
spring.datasource.username=jpaUser
spring.datasource.password=jpaPassword
Further configurations are not necessary for Spring Boot and JPA. Spring Boot uses Hibernate as JPA implementation in this case, so no further configuration is required.
MySQL Database Driver
Next we have to add the database driver for our MySQL database to the project. For this we extend our pom.xml file by a dependency entry with the MySQL JDBC drivers.
The following section shows the complete pom.xml
<?xml version="1.0" encoding="UTF-8"?>
<project xmlns="http://maven.apache.org/POM/4.0.0" xmlns:xsi="http://www.w3.org/2001/XMLSchema-instance"
	xsi:schemaLocation="http://maven.apache.org/POM/4.0.0 http://maven.apache.org/xsd/maven-4.0.0.xsd">
	<modelVersion>4.0.0</modelVersion>

	<groupId>de.ertantoker.tutorial</groupId>
	<artifactId>spring-boot-jpa</artifactId>
	<version>0.0.1-SNAPSHOT</version>
	<packaging>jar</packaging>

	<name>spring-boot-jpa</name>
	<description>Demo project for Spring Boot</description>

	<parent>
		<groupId>org.springframework.boot</groupId>
		<artifactId>spring-boot-starter-parent</artifactId>
		<version>2.0.6.RELEASE</version>
		<relativePath/> <!-- lookup parent from repository -->
	</parent>

	<properties>
		<project.build.sourceEncoding>UTF-8</project.build.sourceEncoding>
		<project.reporting.outputEncoding>UTF-8</project.reporting.outputEncoding>
		<java.version>1.8</java.version>
	</properties>

	<dependencies>
		<dependency>
			<groupId>org.springframework.boot</groupId>
			<artifactId>spring-boot-starter-data-jpa</artifactId>
		</dependency>
		<dependency>
			<groupId>org.springframework.boot</groupId>
			<artifactId>spring-boot-starter-web</artifactId>
		</dependency>
		<dependency>
			<groupId>mysql</groupId>
			<artifactId>mysql-connector-java</artifactId>
		</dependency>

		<dependency>
			<groupId>org.springframework.boot</groupId>
			<artifactId>spring-boot-starter-test</artifactId>
			<scope>test</scope>
		</dependency>
	</dependencies>

	<build>
		<plugins>
			<plugin>
				<groupId>org.springframework.boot</groupId>
				<artifactId>spring-boot-maven-plugin</artifactId>
			</plugin>
		</plugins>
	</build>
</project>
Java Persistence API (JPA) Entity Classes
We will now continue with the creation of the repository interface. In Spring Data, repository interfaces are access classes that provide predefined methods for accessing JPA objects. In all applications that I have developed so far in my career as a software developer, there were the classic CRUD methods. CRUD stands for Create, Read, Update and Delete. Instead of always reimplementing them, Spring Data offers ready-made methods that you can use.
For our CustomerRepository Interface to be defined as a Spring Data Repository Interface, it must be derived from the CrudRepository<T, ID> interface. This interface inheritance is the only thing we have to do. So we have the database access layer with Spring Data at our disposal.
The following section shows the complete CustomerRepository.java class.
package de.ertantoker.tutorial.springbootjpa.repository;

import de.ertantoker.tutorial.springbootjpa.model.Customer;
import org.springframework.data.repository.CrudRepository;

public interface CustomerRepository extends CrudRepository<Customer, Long> {
}
Spring Boot RestController
In order to complete the implementation, we need a RestController that provides our RESTful API. For this we will create the class CustomerController.java, which will then offer a POST method for creating customer objects. As well as a GET method for getting a customer object.
The RestController Class
We create a RestController by declaring the class with the annotation @RestController. This annotation ensures that Spring Boot recognizes the class as RestController at startup and offers the methods declared with @GetMapping or @PostMapping as RESTful HTTP methods.
In addition to the @RestController annotation we add the annotation @RequestMapping(„/customers“) on the class level. This indicates that the REST methods declared in this class are all available at the URL http://<myIP>:8080/customers
An extensive tutorial on how to create RestController can be found in my tutorial RestController with Spring Boot.
Creating with the POST Method
First we will create the POST method for creating new customer objects. For this we implement a new method that accepts a customer object as RequestBody and stores it via the repository interface.
To realize this we first need the annotation @PostMapping. By this we achieve that all HTTP POST requests, which are placed on http://localhost:8080/customers, are processed by this method. The annotation @RequestBody specifies that the customer object is created from the request body of the POST request. The default behavior is that the request is made in JSON.
The following section shows the REST interface for creating a new customer object.
    @PostMapping
    public ResponseEntity saveCustomer(@RequestBody Customer customer) {
        customerRepository.save(customer);
        return new ResponseEntity<>(customer, HttpStatus.CREATED);
    }
Getting with the GET Method
As mentioned above we implement a HTTP GET method to the HTTP POST method noche. This will return a customer object to us. As path parameter we pass the ID of the customer object to the method and then get the customer object back from the database. If there is no customer object with the ID in the database, the HTTP status 404 NOT FOUND is returned.
The following section shows the REST interface for getting a customer object.
    @GetMapping("/{id}")
    public ResponseEntity getCustomerById(@PathVariable Long id) {
        return customerRepository.findById(id)
                .map(customer -> new ResponseEntity<>(customer, HttpStatus.OK))
                .orElseGet(() -> new ResponseEntity<>(HttpStatus.NOT_FOUND));

    }
In the implementation we see that Optional was used. You can learn how to handle Java streams and optional objects in my tutorial Java Streams.
The complete RestController
The following section shows the complete RestController code.
package de.ertantoker.tutorial.springbootjpa.controller;

import de.ertantoker.tutorial.springbootjpa.model.Customer;
import de.ertantoker.tutorial.springbootjpa.repository.CustomerRepository;
import org.springframework.http.HttpStatus;
import org.springframework.http.ResponseEntity;
import org.springframework.web.bind.annotation.*;

@RestController
@RequestMapping("/customers")
public class CustomerController {

    private CustomerRepository customerRepository;

    public CustomerController(CustomerRepository customerRepository) {
        this.customerRepository = customerRepository;
    }

    @PostMapping
    public ResponseEntity saveCustomer(@RequestBody Customer customer) {
        customerRepository.save(customer);
        return new ResponseEntity<>(customer, HttpStatus.CREATED);
    }

    @GetMapping("/{id}")
    public ResponseEntity getCustomerById(@PathVariable Long id) {
        return customerRepository.findById(id)
                .map(customer -> new ResponseEntity<>(customer, HttpStatus.OK))
                .orElseGet(() -> new ResponseEntity<>(HttpStatus.NOT_FOUND));

    }
}
Launch Spring Boot RESTful API
Now that we have implemented our RESTful API with the two HTTP methods, we will start them.
First we have to build the Spring Boot application with Maven. The „mvn clean install“ command creates the Spring Boot application.
Once the Maven build process is completed with a „BUILD SUCCESS“, we will find a directory named „target“ in our project folder.
The „target“ folder now contains our finished JAR file. With the command „java -jar spring-boot-jpa-0.0.1-SNAPSHOT.jar“ we start our Spring Boot application. Please note that the MySQL database must be started via Docker Compose before starting it.
You can find a detailed description how to create RESTful API on my tutorial RestController with Spring Boot.
Conclusion
In this tutorial we learned how to create a RESTful Spring Boot application with Spring Data, Spring Repository, JPA and MySQL. More detailed tutorials can be found on my blog. I hope you enjoyed the tutorial and would love to hear your criticism, suggestions and comments.

Great internet site! It looks extremely professional! Maintain the helpful job!